Practical Introduction
Before walls are closed, luxury is made: careful planning of a hidden cabling infrastructure ensures clean walls, smooth façades and expandable intelligent functionality. Read this guide for actionable strategies tailored for Egypt and the region, with general standards adaptable globally.
What Is Structured Cabling and Why Is the Pre-Drywall Stage Essential for Luxury Aesthetics?
Structured cabling is a standardized set of cables, conduits, termination panels and central racks designed to serve communications, audio, video and home automation at the building level. In luxury residences, pre-drywall planning allows you to:
- Completely hide cables behind surfaces without later visible openings on façades.
- Centralize and shorten cable runs to reduce cable length and signal loss.
- Provision cooled, secured technical rooms (MDF/IDF) close to the service center.
In Egypt and the Middle East—where clean façades and visual order are highly valued—investing in the pre-drywall stage reduces future repair costs and preserves interior design value.
Separating High-Voltage (Power) from Low-Voltage: Practical Rules to Prevent Interference
- Keep 230V power runs separate from signal runs (networks, audio, control systems) as much as possible; where crossing is unavoidable, cross at a 90° angle.
- Place power cables in separate conduits rated for mains with insulating sleeves, while signal cables should be run in non-conductive conduits or shielded raceways where needed.
- When sharing a duct or tray space in a rack, use physical partitioning inside the channel to reduce electromagnetic coupling.
- For sensitive equipment (high-fidelity amplifiers, sensitive sensors), route their cables away from motor groups and large switches.
Conduit Sizes and Future-Proofing Pull Strategies
- Target empty spare conduits for every major run. Typical practical examples for rooms in a luxury home:
- Data outlets and Access Point feed: 20–25 mm conduits (allow Cat6A plus a spare pull).
- Indoor fiber optic cables: 20 mm or a sleeve sized for a multi-fiber bundle.
- Power circuits (general outlets, curtain motor outlets): 25–32 mm as a baseline, larger conduits for multi-conductor runs.
- Main risers/consolidation ducts: 50–75 mm or larger depending on the number of backbones and expansion plans.
- Avoid many tight bends; keep smooth curves and a suitable bend radius (follow cable manufacturer recommendations; often 10× cable diameter for fiber).
- Insert a pull string in every empty conduit and keep labelled access points at both ends to facilitate later pulls.
- Plan reserve channels within ceilings and between floors to allow later runs without opening walls.
Practical Routing Strategies: Paths, Crossings and Rack Circuits
- Design vertical risers in a central location near the service room to minimize cable lengths.
- Vertical raceways should be enclosed and secured to facilitate cable travel between floors.
- Endpoint runs should terminate at low-depth recessed mounting boxes to avoid later chiseling.
- Provide termination rooms every 40–60 meters in very large houses to reduce signal loss and maximize network performance.
Central AV Racks and Concealed Media Distribution: How to Eliminate Visual Clutter
- A cooled equipment room with metal racks, front and rear cable management, and a structured wiring panel with patch panels.
- Use patching inside the equipment room instead of running long HDMI cables through walls. For long distances, consider fiber HDMI or video extenders at both ends.
- Design hidden media channels behind walls for in-wall-rated HDMI runs or fiber-based video solutions.
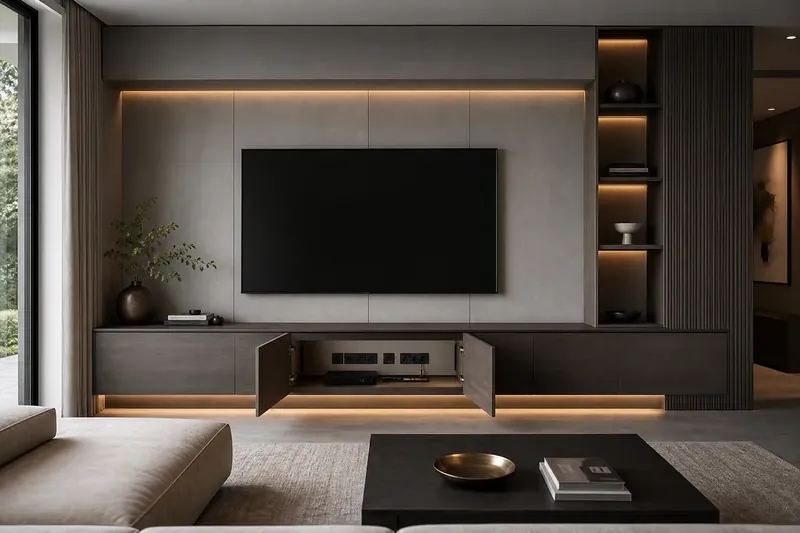
- Use recessed media boxes behind the TV with brush plates dedicated to cabling, hidden power outlets and signal pass-throughs.
Concealing Motorized Curtains, TV Lifts and Control Panels: Installation Details
- Motorized curtains: run a dedicated conduit for the motor from the headbox to the control box; leave a spare power feed and a data pull (Cat6A) for each main window. Design a concealed pelmet to house the track and motor without affecting the fabric face.
- Motorized TV lifts: plan a service aperture behind the wall with a recessed power inlet, a passage for HDMI or Fiber HDMI and small ventilation holes if a device is enclosed.
- Light switches and control panels: use low-voltage mounting brackets or flush-mounted plates with Cat6 or bus runs (KNX, DALI, RS485) depending on the system. Install at a consistent ergonomic height (e.g., 110–120 cm from floor) to integrate with design.
PoE as a Means to Reduce Visible Wiring: Cameras, Access Points and Touch Panels
- PoE (Power over Ethernet) supplies power and data over a single cable: practical for devices like security cameras, wireless access points, touch panels and sensors.
- Use Cat6A shielded for installations exposed to interference or when PoE++/high-power is required (verify device power specs).
- Plan a managed PoE switch in the equipment room with features like power monitoring, VLANs and UPS feeding for continuous camera and AP operation.
- For runs that exceed ~100 m, consider fiber between floors or PoE-to-fiber converters.
Decision Table / Checklist
| Area / Room | Suggested Cable Type | Typical Conduit Diameter (mm) | Pull String | Termination / Room Notes |
|---|---|---|---|---|
| Living Room (central TV) | Cat6A + In-wall HDMI/Fiber | 25 mm (data), 32 mm (power/lift) | Yes | Recessed media box behind TV, internal power inlet |
| Bedrooms | Cat6A + shading motor connectors | 20–25 mm | Yes | Spare conduit for motorized curtains + low-depth switch box |
| Access Points / Ceiling | Cat6A Shielded | 20 mm | Yes | Short ceiling path, service access 50–100 cm for maintenance |
| External Cameras | Cat6A Shielded in external conduit | 25–32 mm | Yes | Downward-sloping conduit for drainage, service box at base |
| Equipment Room (MDF) | 19" racks, Patch Panels, UPS, PoE Switch | Main trunk 75 mm or larger | Multiple | Mechanical ventilation, power switch floor tray, security lock |
Note: These are typical reference values. Consult cable manufacturers and local electrical codes.
Egypt & Middle East Practical Examples
- In a Cairo villa with an open-plan layout, placing the equipment room near the central stair reduced internal access cabling lengths by 30% compared with locating it at the exterior wall.
- In a luxury apartment in central Dubai, empty conduits were installed at every main window to enable future motorized curtains without demolition.
- In a coastal villa project, teams used salt-resistant internal PVC conduits and tested cables before final waterproofing to avoid cable damage from salt spray.
What Should Designers and Owners Do Before Signing Implementation Plans?
- Request an as-built structured cabling layout before closing walls.
- Coordinate a meeting with the electrical contractor, network engineer and motorized shading supplier to align service points and outlets.
- Ensure an ICT service room is placed near the design axis (near the entrance or floor center) with ventilation and an independent power source.
- Plan for future areas such as EV charging stations, advanced alarm points and additional media interfaces.
Frequently Asked Questions
- Do I need fiber all the way inside the house?
- Not typically for all homes; however, for major future performance needs and long internal distances in very large homes, internal fiber backbones within risers provide high-capacity expansion.
- What is the maximum Ethernet cable length without extenders?
- The practical rule for copper is ~100 meters for reliable performance; for longer distances consider intermediate switches, fiber or PoE converters.
- Can I use cheap PVC conduits for all runs?
- Yes for many internal applications, but for locations exposed to heat, mechanical stress or outdoor conditions use appropriate rated conduits and review specifications.
- How do I hide the power for a motorized TV lift?
- Design a service box behind the wall with a recessed power inlet and ventilation channels, and make wires accessible for maintenance without demolition.
- Is PoE enough for all panels and user interfaces?
- PoE is excellent for many panels, cameras and access points, but some motors or high-consumption devices will still require separate AC power.
- When should I use Shielded Cat6A instead of UTP?
- Use shielded cabling where strong interference sources exist (large motors, industrial electrical sources) or when using PoE++ near EMI sources.
- Who is responsible for ensuring compliance with local standards?
- The licensed contractor and the local electrical engineer are responsible; request approvals and photographs before closing walls.
Invitation for Consultation with Homey
For owners and designers who want to turn plans into integrated implementation, Homey offers specialist consulting: Homey Architectural Lighting Design, Homey Custom Smart Home Integration, Homey Centralized Media Distribution Consultation, Homey Motorized Shading and Automation Services. Book a pre-drywall planning review with our team to receive a detailed structured cabling layout and technical requirements memo.
Amazon
We recommend browsing tools and materials to review specifications and choose items appropriate for your project (product availability is for reference and may vary): Amazon storefront
- Search categories: Structured Wiring Panels, CAT6A Shielded Bulk Cable, In-Wall Rated HDMI and Fiber HDMI, PVC Conduit & Corrugated Tubing, Low-Voltage Mounting Brackets, Brush Wall Plates, Industrial Cable Raceways.
Quick Implementation Steps
- Make the pre-drywall stage a decisive milestone in the project schedule.
- Design a cooled, secure central equipment room.
- Use spare conduits and pull strings in every run.
- Clearly separate high-voltage and low-voltage circuits, crossing at 90° when necessary.
- Adopt PoE where practical to reduce visible wiring, but remain flexible for AC-powered solutions.
Safety & Regulatory Notes
Follow local codes and building regulations, and employ licensed specialists for structural, electrical, plumbing and mechanical systems. Do not skip pre-closure testing (continuity and certification tests for network cables and device commissioning).
References
- Pre-wiring planning guide: (https://www.utdtechnology.com/network-infrastructure/pre-wiring-a-new-house-for-smart-home-technology-the-2026-strategic-guide/)
- Smart-home pre-drywall wiring guide: (https://listenup.com/blogs/posts/smart-home-wiring-guide-what-to-install-before-drywall)
- General smart home wiring guidance: (https://primetechsupport.com/es/blogs/hogares-inteligentes/smart-home-wiring-guide-what-to-install-before-drywall)
Practical steps for handover, testing and long‑term usability
High-end finishes demand that infrastructure work be finished correctly and verified before surfaces are closed. Schedule a coordinated walkthrough with the architect, electrical contractor and the AV/IT integrator while the structure is still open so routing choices, closet locations and service entries can be confirmed in situ. Reserve clear working space and intentional openings for future access—these are simpler to plan before plaster or cladding than to add later. Also include provisions for ventilation and a secure lockable enclosure for central electronics so equipment lifespan and performance are not compromised by heat or dust.
After installs are complete but before final finishes, carry out systematic checks and produce concise handover documentation. Verify each termination point for correct pairing and signal flow, and record which conduit serves which zone. Provide the homeowner with a simple map of outlet functions and a short maintenance checklist that notes where spare capacity exists and how to shut down or isolate circuits safely. For bespoke projects, consider asking Homey Decor or your integrator to compile the as‑built notes and hand the owner a labelled cabinet diagram and an electronic copy of the drawings.
- Agree a staged sign-off process with milestones: route approval, rough‑in inspection, termination test, and final dressing. Make these part of the contract so deviations are caught early.
- Label both ends of every run with the same unique ID and keep a single master log (digital and printed) that maps IDs to rooms and device types.
- Leave easily replaceable blank faceplates or modular panels at outlets to accept future modules (extra data, fiber or control interfaces) without opening the wall.
- Coordinate fire‑and‑safety sealing: ensure any floor or wall penetrations are closed with compliant firestop materials that still permit future pulls, and mark them on the as‑built drawings.
Frequently Asked Questions
When is the latest moment to change the wiring plan without causing major rework?
Make changes while the walls are still open; decisions about closet locations, major risers and feed entries should be finalized before plastering. Minor outlet additions can sometimes be handled later but will usually increase cost and may affect finish work.
What simple tests should I insist on before sign-off?
Ask for continuity and functional checks for each outlet—confirm power presence where needed, network link light and data throughput at basic levels, and that audio/video feeds reach the intended termination. Require the installer to note any failures and resolve them before the final inspection.
How can I make sure the system is easy to expand in the future?
Prioritise spare capacity at the central enclosure and spare openings at room terminations, use modular plates, and keep a clear, consistent labelling system. Also keep a copy of the as‑built plan with the homeowner so future contractors can understand existing routes without guesswork.
For a coordinated solution tailored to your space, explore related Homey Decor services and products, and browse Homey’s selected home products on Amazon. Homey Decor services | Homey on Amazon