Introduction
A concise, practical article to help homeowners and developers make logical, defensible decisions when choosing finishing materials for walls, floors, ceilings, and internal joinery. You will learn how to evaluate moisture resistance, balance upfront cost against durability, and build a weighted decision matrix that works across multiple rooms in one project. At the end you'll find practical checklists, cross-sections, and applied examples relevant to Egypt and the broader Middle East.
General principles for evaluating materials
- Start by defining each room’s functional requirements: moisture level, foot traffic, sun and salt exposure (proximity to the sea), and whether children or pets are present.
- Treat a finish as a multi-functional layer: surface, moisture barrier, thermal/acoustic insulation, and a structural fastening surface for joinery.
- Separate performance requirements (strength, moisture resistance, acoustics, cleanability) from aesthetic requirements (pattern, texture, color).
- Check local safety codes and regulations and consult specialists for structure, electrical, plumbing, and child-safety details.
How to evaluate moisture resistance across walls and floors
- Define exposure level: continuously wet (bathroom, shower), intermittently damp (laundry), dry.
- Evaluate layers: surface type (tile, stone, wood, engineered panels), presence of a vapor/water barrier, and quality of bedding and adhesives.
- Use surface moisture meters and wood moisture probes before and after installation to verify conditions.
- Examples for Egypt / the region: - In bathrooms in Cairo or Alexandria: porcelain tile or engineered stone with a waterproof membrane behind the tile (concrete board or water-resistant backer), and flexible silicone at openings and joints. - In coastal apartments: select salt-resistant finishes such as porcelain or PVC panels for lower cabinets.
Trade-offs between initial cost and lifecycle for joinery
- Solid timber: higher upfront cost, high durability if well designed and installed, refinishable and repairable.
- Engineered joinery (MDF, HDF, engineered wood): mid-range cost, better dimensional stability in variable humidity, but requires good sealed finishes to prevent moisture ingress.
- Consider total cost = purchase + installation + periodic maintenance + refurbishment life. In many cases, higher initial investment in better joinery reduces annual cost over a 10–15 year horizon.
How cleaning and maintenance requirements affect long‑term value
- Easy-to-clean materials (porcelain tile, PVC panels, washable paints) reduce operational time and cost.
- Materials that require special care (unfinished natural stone, unsealed timber) may preserve a higher aesthetic value but raise maintenance costs.
- Practical equation: estimate annual cleaning time and cost for a product and compare it to its effect on property value and occupant satisfaction.
Which ceiling finishes give the best acoustic and moisture performance?
- Plastered gypsum with a moisture-resistant liner: good appearance and accepts acoustic insulation.
- Moisture-resistant gypsum boards (RH boards) or modified fiber boards: suitable for bathrooms and kitchens when installed with proper wet-area detailing.
- Metal suspended ceilings with acoustic infill: applied in commercial and residential spaces to reduce sound transfer and provide easy access to services.
- Bottom line: combine a moisture-resistant surface layer with internal acoustic insulation to balance both performances.
How to build a weighted multi-room decision matrix (step by step)
- Define core criteria (example): moisture resistance, durability, ease of cleaning, initial cost, aesthetics, acoustic performance.
- Assign a weight to each criterion so the sum = 100 (or 1.0). Quick example: moisture 25, durability 20, cleaning 20, cost 15, aesthetics 10, acoustics 10.
- List material options for each finish type (floors: porcelain, engineered parquet, SPC vinyl/LVT, etc.).
- Score each option on a 1–5 scale for each criterion (1 poor — 5 excellent).
- Calculate weighted points: weight × score, then sum to get a total for each option.
- Compare option totals across rooms. Use results to set an acceptable minimum for each room or to choose versatile materials across the project.
Example numeric illustration (illustrative scales) — bathroom: - Criteria & weights: moisture 40, cleaning 25, durability 20, cost 15 (total 100). - Porcelain tile: scores = moisture 5, cleaning 5, durability 5, cost 3 → points = 200 + 125 + 100 + 45 = 470. - Engineered parquet: scores = moisture 2, cleaning 3, durability 3, cost 4 → points = 80 + 75 + 60 + 60 = 275. (For illustration only — adjust weights and scores to your project reality.)
Decision table / checklist comparing lifecycle value and maintenance effort
| Finish item | Expected lifecycle | Maintenance level | Cleanability | Practical note |
|---|---|---|---|---|
| Porcelain / ceramic tile | 20+ years | Low | High | Suitable for kitchens and bathrooms |
| Natural stone (sealed) | 15–30 years | Medium | Medium | Requires periodic sealing in salty environments |
| Engineered parquet | 10–25 years | Medium | High (if sealed) | Suitable for living rooms; avoid direct moisture exposure |
| Solid hardwood parquet | 20+ years | High (refinishing) | High | Can be sanded and refinished |
| SPC / LVT vinyl | 10–20 years | Low | High | Cost-effective, partially water-resistant |
| Microcement / cementitious finishes | 10–20 years | Medium | Medium | Contemporary look; needs good sealing |
| Washable paints | 5–10 years | Low | High | Appropriate for interior walls |
Cross-section: installing a moisture barrier behind wall/floor finishes
A concise practical cross-section (from outside layer to inner build): - Final finish surface (tile/stone/wood/vinyl) - Bedding or suitable adhesive - Substrate or board (e.g., moisture-resistant board or smooth concrete base) - Flexible waterproofing membrane carefully applied around pipe penetrations and corners - Thermal/acoustic insulation where required - Structural backing / wall or floor carcass
Tip: use waterproof tapes and flexible sealants at joints and penetrations. Follow local installation standards and hire a qualified waterproofing contractor.
Applied project examples in Egypt and the region
- Apartment in Cairo (open-plan kitchen to living): polished porcelain flooring with timber-treated thresholds at transitions, lower cabinets in moisture-resistant engineered wood with waterproof coatings, and local waterproofing at washing machine and pipe penetrations.
- Coastal villa in Alexandria: high-slip-resistance porcelain on balconies, exterior cabinets in powder-coated aluminum or PVC, and UV-resistant silicone joints.
- Apartment in the Gulf states: suspended ceilings with moisture-resistant panels in bathrooms and acoustic insulation between apartments to limit noise transfer.
Products and tools for review (browse on Amazon)
We recommend checking surface moisture meters, professional cleaning supplies, wood and stone maintenance kits, and finish sample boards. You can review candidate products in our tools review shop: Amazon storefront
(Note: review product specifications and seller reviews, and do not assume a specific item’s availability — use the store for discovery and comparison only.)
Quick pre‑purchase and pre‑installation checklist
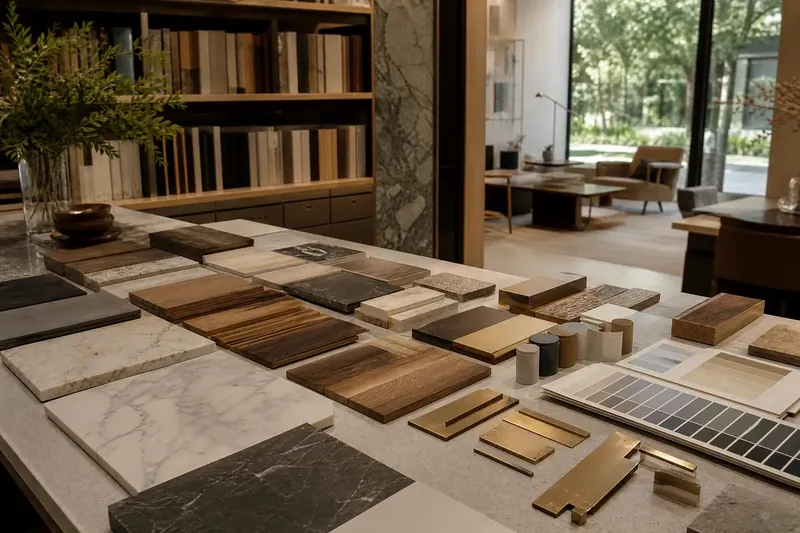
- Collect physical samples (sample boards) and observe them in the real site lighting.
- Perform surface and subfloor moisture tests where floors meet foundations.
- Apply the weighted decision matrix per room and document clear results.
- Obtain detailed installation quotations from specialist contractors based on material specifications.
- Plan routine maintenance and include it in operating budgets.
Suggested media and images
- Image 1: Infographic of a multi-criteria decision matrix (axes: moisture resistance, cleaning, durability) comparing walls/floors/ceilings.
- Image 2: Completed comparison table (checklist) showing lifecycle and maintenance effort for common materials.
- Image 3: Exploded cross-section diagram of a moisture barrier behind a finish — clear layer labels.
- Image 4: Close-up shot of internal joinery details (joints, edges, finish layers).
- Add a video carousel from Homey’s YouTube channel showing executed examples and expert interviews (include paired video descriptions available on the channel).
Frequently Asked Questions
- What is the best floor for bathrooms in terms of moisture resistance? - Porcelain or ceramic tile is excellent for wet areas when installed over a proper waterproofing membrane.
- Is engineered joinery suitable for kitchens? - Yes, provided it has a moisture-resistant finish and is detailed with good ventilation and protection from direct water contact.
- How do I balance cost and quality when choosing materials for a villa? - Use a weighted decision matrix: assign importance weights per room, score alternatives, and compare weighted totals to make informed trade-offs.
- Should natural stone be sealed against stains? - Sealing is recommended in damp or salty environments; routine resealing extends aesthetic life and stain resistance.
- How do I ensure a suspended ceiling won’t be affected by moisture? - Specify moisture‑resistant panels, use appropriate insulation and vapor control where needed, and ensure proper ventilation and installer details.
- How often should solid timber require maintenance? - It depends on usage; sanding and refinishing cycles typically occur every 10–20 years depending on wear.
Homey consultations and services
If you want a tailored weighted decision matrix for your project or integrated supply-and-install services, Homey offers: - Homey Interior Design Consultation - Homey Material Sourcing Service - Homey Turnkey Finishing Execution
Contact Homey for site assessment, sample coordination, and costed implementation pathways.
References
- (Design and finishing best practices — Architectural Digest) (https://www.architecturaldigest.com)
- (Residential materials insights — Dwell) (https://www.dwell.com)
- (Practical installation and maintenance tips — Bob Vila) (https://www.bobvila.com)
Practical steps for a smoother installation and long‑term upkeep
Before materials arrive, finalise a short on‑site plan that captures storage, sequencing, and protection. Have suppliers supply physical samples or full‑size panels so you can approve finishes under the apartment’s light and alongside neighbouring surfaces. Store boards, panels and joinery pieces inside the conditioned space and keep them covered; delaying installation until products have adjusted to the room’s temperature and humidity reduces gaps, warping and adhesive failures. Coordinate work between trades so wet trades (plumbing, tiling) are finished and cured before delicate finishes are installed or exposed.
At handover, create a concise maintenance and acceptance file for each room. Include the accepted sample, the batch or colour reference from the supplier, recommended cleaning agents and techniques, and a simple calendar for routine checks (sealant lines, grout condition, mechanical fixings). During the first weeks after installation, carry out frequent visual checks and small tests of cleaning products on inconspicuous areas to confirm compatibility. Keeping a small reserve of each finish — tiles, paint, laminate plinths or joinery veneer — makes future repairs less visible and speeds up any later touch‑ups.
- Approve a full‑size mock‑up or sample board in the actual room and sign off on it before production proceeds.
- Acclimatise and store materials inside the conditioned space; avoid installing directly from cold or damp storage to prevent dimensional issues.
- Protect completed surfaces from dust and impact while other trades finish work; use temporary barriers and soft coverings where installers walk.
- Test cleaning products on a hidden patch and record approved methods in the handover file to avoid surface damage from incompatible chemicals.
- Keep a labelled spare kit of matching materials and the supplier/reference details with the property file for future maintenance or replacements.
Frequently Asked Questions
How long should I wait before using a newly finished bathroom or kitchen?
Allow finishes and sealants to reach their recommended condition before heavy use. Rather than a fixed timeframe, follow supplier and installer guidance about curing or setting, and avoid strong cleaning or mechanical stress until those instructions are met. Early gentle inspections will help spot any issues that need correcting while they are easy to fix.
What’s the simplest way to confirm an installer’s workmanship before full installation?
Ask for a small mock‑up or trial area to be completed first and inspected together. This reveals workmanship quality, alignment tolerances and how finishes meet your aesthetic expectations. Also check references, recent project photos and that the contractor will provide a short written record of what was installed and any site adjustments made.
What should I include in a maintenance file handed over to the homeowner?
Include at least one approved sample, the supplier’s product reference or colour code, recommended cleaning agents and methods, any special maintenance intervals (for seals, re‑oiling or re‑sealing), and contact details for the supplier or installer. This makes future repairs or replacements straightforward and helps maintain appearance and performance over time.
For a coordinated solution tailored to your space, explore related Homey Decor services and products, and browse Homey’s selected home products on Amazon. Homey Decor services | Homey on Amazon