Short practical introduction
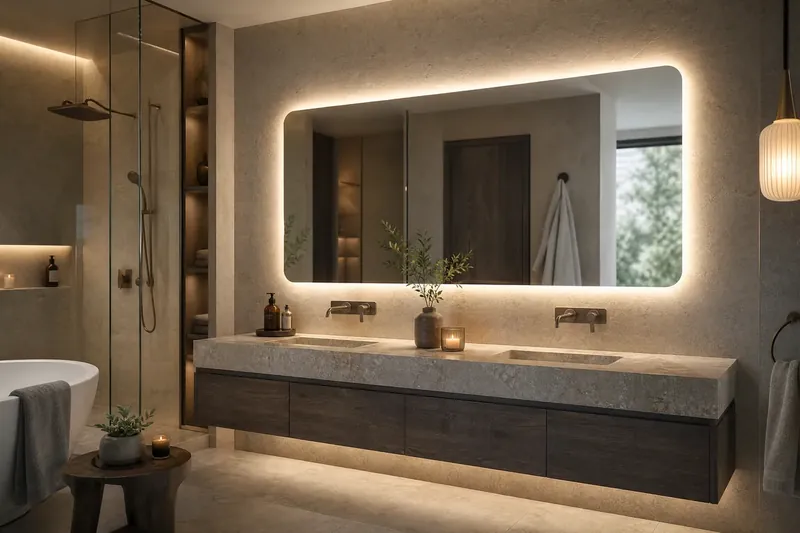
You want to upgrade your bathroom with a modern illuminated mirror that delivers even lighting for shaving and grooming while looking elegant and functional. This guide explains how to choose the right size and shape, common safety requirements, how a demister works, differences in correlated color temperature (CCT), when to choose hardwired vs plug-in installation, and how to extend the life of your electronic mirror.
Choosing the right size and shape for the vanity
- Rule of thumb: mirror width ≈ 60–80% of the vanity (counter) width. If the counter is 1200 mm, generally choose a mirror 720–960 mm wide. (1200 mm = 47.2 in).
- Mirror height: start from 1000–1400 mm above the finished floor as a reference and adjust for your users’ heights. For family bathrooms, a useful center height for face and shoulders is 1600–1700 mm from the floor to the mirror’s midline.
- Double basins or full-width mirrors: for two washbasins, select two separate mirrors for each user or one full-width mirror with divided lighting.
- Practical shapes: rectangles for everyday reliability and dependability; ovals or circles for softer lighting and design harmony. Shape affects light distribution around the face — rectangles tend to emphasize vertical lighting, while circles/ovals give smoother, more flowing illumination.
Relative reflections and spatial planning
- Leave 50–100 mm between the top of the mirror and the ceiling if possible to avoid a cramped feel.
- Make the vertical distance from the bottom edge of the mirror to the counter surface about 120–150 mm for small bathrooms if the basins are elevated.
- Check for electrical back-boxes or planned concealed junction-box locations early; early planning reduces last-minute changes during installation.
IP ratings and safety around spray and humidity
- Basic concepts: the IP (Ingress Protection) rating measures resistance to solids and moisture. Bathrooms are often divided into wet zones (Zone 0, 1, 2 depending on your design standard) and devices should be selected for the zone where they are mounted.
- Practical guidance: illuminated mirrors mounted near typical water splashes usually require a minimum of IP44 (protection from solid objects and splashing water from any direction). If direct water exposure or heavy spray/pressure cleaning is possible, consider IP65 or higher.
- Important warning: check local regulations and hire a licensed electrician for installations inside wet zones and for any residual-current device (RCD/GFCI) requirements.
How a demister works
- Principle: a warm (electrically resistive) pad placed behind the visible area of the mirror lightly heats the glass surface to prevent condensation, keeping the viewing area clear after a shower.
- Practical specs: demister capacity is described in watts per square meter; lower-power pads can keep a localized area around the face clear, while higher-power pads defog larger mirrors more quickly.
- Compatibility note: confirm that the mirror and demister are from the same manufacturer or certified for joint use, and check whether the demister has a separate switch or an integrated motion/timer sensor.
Practical comparison of CCT ranges and effects on personal grooming
- Common ranges:
- Warm: 2700–3000 K — warm and cozy, enhances warm tones but can alter perceived makeup colors.
- Neutral/True: 3500–4000 K — a good balance between comfort and color accuracy; an excellent choice for family bathrooms.
- Cool/Daylight: 5000–6500 K — daylight-like feeling and higher detail visibility, useful for precise shaving and detailed makeup.
- Color Rendering Index (CRI): aim for CRI ≥ 90 for accurate color rendition during makeup and shaving.
- Practical recommendation: choose mirrors with adjustable CCT if possible (switchable or multi-color) so you can adapt between daily use, photography, and special occasions.
Electrical connection: Hardwired vs Plug-in — safe procedures
- Plug-in: easy to install and suitable where the power point is well away from direct water exposure. Good for temporary installations or when you want to avoid major electrical work.
- Hardwired: gives a clean look with concealed wiring and is preferred for permanent installations. Typically tied to a circuit protected by an RCD/GFCI and a secured switched spur.
- Safety rules:
- Always place the connection point / junction box behind the mirror or outside the direct spray zone.
- Use approved LED drivers and power supplies rated for bathroom use with appropriate cooling.
- Do not place the RCD/GFCI feed in the same way as high-load appliances without consulting an electrician.
- Never use a dangling plug or visible extension cord inside a shower area or directly above a water source.
- Tip: for compliance and safety, hire a licensed electrician for any wiring work in wet zones.
Differences in LED drivers and cooling
- Driver types: constant-voltage drivers for integrated strip LEDs, or constant-current drivers for changeable LED modules. Ensure driver compatibility with the mirror’s design.
- Ventilation: mount the driver in a ventilated box or outside the mirror cavity where possible to avoid excessive heat, which shortens component life.
Decision table / Checklist before purchase
Explore the matching Homey Decor service
Homey designs illuminated LED mirrors in practical shapes, sizes, and light settings for bathrooms, dressing rooms, homes, and commercial projects.
View LED Mirrors service| Selection factor | What to look for | Practical step | Priority |
|---|---|---|---|
| Installation location | Inside/outside spray zone | Choose appropriate IP (IP44 for regular spray areas, IP65 for direct exposure) | High |
| Mirror size | width = 60–80% of counter | Measure before ordering | High |
| CCT and CRI | switchable or neutral CCT, CRI ≥ 90 | For makeup/shaving choose neutral-to-cool with high CRI | High |
| Electrical connection | plug-in or hardwired? | For permanent installs choose hardwired with RCD | High |
| Demister | wattage and coverage area | Compare W/m² according to mirror size | Medium |
| Maintenance | access to the driver | Ensure a proper junction box and annual maintenance access | Medium |
| Installation hardware | screw type and brackets | Use wall anchors rated for the load and stainless fixings | High |
Basic installation steps (brief)
- Measure and mark the mirror location and secure the mirror center in relation to the counter and basin.
- Prepare the electrical junction box according to the plan (outside spray area if possible).
- Fit the metal brackets or screws rated for the mirror weight following the manufacturer’s instructions (use appropriate anchors for concrete/brick/plasterboard).
- Have a qualified electrician connect the driver to the supply and place the driver in a well-ventilated location.
- Hang the mirror on the brackets, level it and secure safely.
- Test operation: lighting, demister, and any protective devices.
Routine maintenance to extend service life
- Surface cleaning: use a mild glass cleaner or soap and water with a microfiber cloth. Avoid abrasive cleaners or strong solvents that may damage the rear coatings.
- Inspect edges and seals: check for moisture build-up or bubbles behind the edge to prevent mirror backing degradation.
- Check the driver and connections annually: ensure there is no unusual heat or burning smell.
- Inspect the demister: if it stops clearing quickly, check wiring or replace if performance weakens.
Design notes for Egypt and the wider Middle East
- Supply and wiring capacity: older homes may require partial electrical circuit upgrades before installing smart mirrors; plan this with an electrical engineer.
- Ambient and cozy lighting: in smaller Cairo apartments and city flats, an adjustable-CCT mirror gives flexibility between evening ambience and daytime clarity.
- Fitting into tiled/stone walls: use anchors and hangers rated for the weight and type of wall; combine plastic anchors with metal screws or specialist tile anchors as appropriate.
Amazon
We recommend reviewing the Homey Bazaar storefront on Amazon for product categories related to illuminated mirrors and accessories (junction boxes, LED drivers, wall fixings) as a source of ideas and specifications. You can browse here: Amazon storefront
(Notice: this is an invitation to browse and inspect product listings and does not guarantee stock of any specific item — check seller details before purchase.)
Frequently Asked Questions
How do I decide whether a mirror needs IP44 or IP65? - Choose IP44 for installations near normal splashes (for example, above a washbasin). Consider IP65 if the mirror could receive direct water spray or heavy-pressure cleaning. Always consult local regulations and a licensed electrician.
Can I install an illuminated mirror myself using a plug-in connection? - Yes, if the power outlet is in a safe location outside the direct spray zone. For permanent installations or defined wet zones, hardwiring by a licensed electrician is recommended.
How long does a demister take to work and clear the fog? - It depends on the demister wattage and mirror size; typically it takes 1–5 minutes to warm the surface and keep the viewing area clear. Check the specific model’s specs.
Which CCT is best for makeup? - Neutral to cool CCT (3500–5000 K) with CRI ≥ 90 gives the most accurate color rendering for makeup and shaving.
What are signs of a failing driver or LED array? - Intermittent flicker, color shifts, excessive heat or a burning smell. If you notice any of these, switch off power and call a technician.
Can I add a motion sensor or timer to the mirror? - Many illuminated mirrors support integrated motion sensors or timers, but wiring and driver compatibility must be checked. Consult the manufacturer or a licensed electrician.
How do I keep moisture out of the back of the mirror? - Ensure a tight protective seal, mount the mirror away from direct water accumulation, and inspect edges annually; repair any seal failures quickly.
Conclusion and Homey consultation invitation
To convert your ideas into a safe, beautiful execution that suits your home in Egypt or elsewhere in the region, Homey offers tailored services: Homey Smart Lighting Consultation, Homey Bathroom Vanity Design Service, and Homey Electrical Planning Service. Book a site survey and design consultation so we can recommend the right specifications and a secure, well-coordinated installation.
References
- (https://www.warmlyyours.com/en-US/posts/how-to-install-an-led-bathroom-mirror-mounting-wiring)
- (https://www.fabglassandmirror.com/blog/led-bathroom-mirrors-guide/)
- (https://www.plumbworld.co.uk/blog/illuminated-led-demister-bathroom-mirrors-explained/)
Practical placement, wiring and longevity tips
Treat your illuminated mirror as one element in a layered lighting scheme rather than the sole light source. Combine ceiling fixtures for general illumination, dedicated task lights at face level, and the mirror’s integrated lighting to reduce harsh shadows and improve colour rendering for grooming. Where the mirror supports dimming, install a compatible dimmer or multi-level switch so intensity and mood can be adjusted for bright morning tasks or softer evening lighting; test the setup at typical daytime and after-dark times to confirm balance and reflections.
Plan the physical mount and electrical connections around the wall construction and future service access to simplify maintenance. Confirm the wall and fixings can support the mirror’s weight, select anchors appropriate for masonry, studs or plasterboard, and keep junction boxes reachable rather than sealed behind fixed panels. Verify whether the mirror requires a neutral or a specific dimmer type to avoid later incompatibility, and in humid bathrooms choose corrosion-resistant fixings, coordinate placement with ventilation to reduce steam exposure, and protect LED drivers and edge seals from prolonged moisture.
- Mark eye-line heights for primary users and position the mirror so faces sit near the visual centre.
- Confirm whether the unit is plug-in or requires hardwiring before cutting any access holes.
- Verify dimmer and sensor compatibility with the mirror’s LED driver to prevent flicker or control issues.
- Use soft cloths and non-abrasive cleaners; avoid solvents and promptly remove standing water from edges.
- Label the circuit and keep a photo or note of the wiring layout to simplify future repairs or replacements.
Frequently Asked Questions
Can I install an illuminated bathroom mirror myself safely?
Plug-in models can often be fitted by a competent DIYer following the instructions, but any work that alters fixed wiring, installs inside a wet zone, or requires hardwiring should be carried out by a qualified electrician to meet local regulations.
How can I avoid glare and unflattering shadows when using the mirror?
Avoid a single bright overhead source; choose diffused frontal or edge lighting and consider supplementary side lighting. Dimming control and a slightly warmer tone for relaxed tasks helps reduce harsh reflections while still allowing accurate grooming when needed.
What should I do if the mirror fogs and there is no built-in demister?
Improve ventilation by running the extractor fan during and after showers, allow some air circulation in cabinets, and wipe the surface after heavy use. For persistent condensation, enhance room ventilation or consider upgrading to a unit with anti-fog features.
For a coordinated solution tailored to your space, explore related Homey Decor services and products, and browse Homey’s selected home products on Amazon. Homey Decor services | Homey on Amazon